

Texas Christmas Pickles have been a holiday staple in my family for generations, embodying the bold spirit of Texas cuisine. These sweet, spicy, and tangy homemade pickles combine vibrant red and green peppers with a surprising jalapeño kick. They’re not just a condiment; they’re a festive tradition that lights up any holiday table. Once you make a batch, you’ll understand why they’re cherished across the Lone Star State and perfect for gifting.
Why You'll Love This Recipe
- Sweet, tangy, and spicy flavors that dance on your tongue
- A big batch perfect for holiday gifts and party platters
- Simple ingredients with no special tools required
- Festive colors that make your table pop
- I make these every December and they’re gone in days
Ingredients You’ll Need
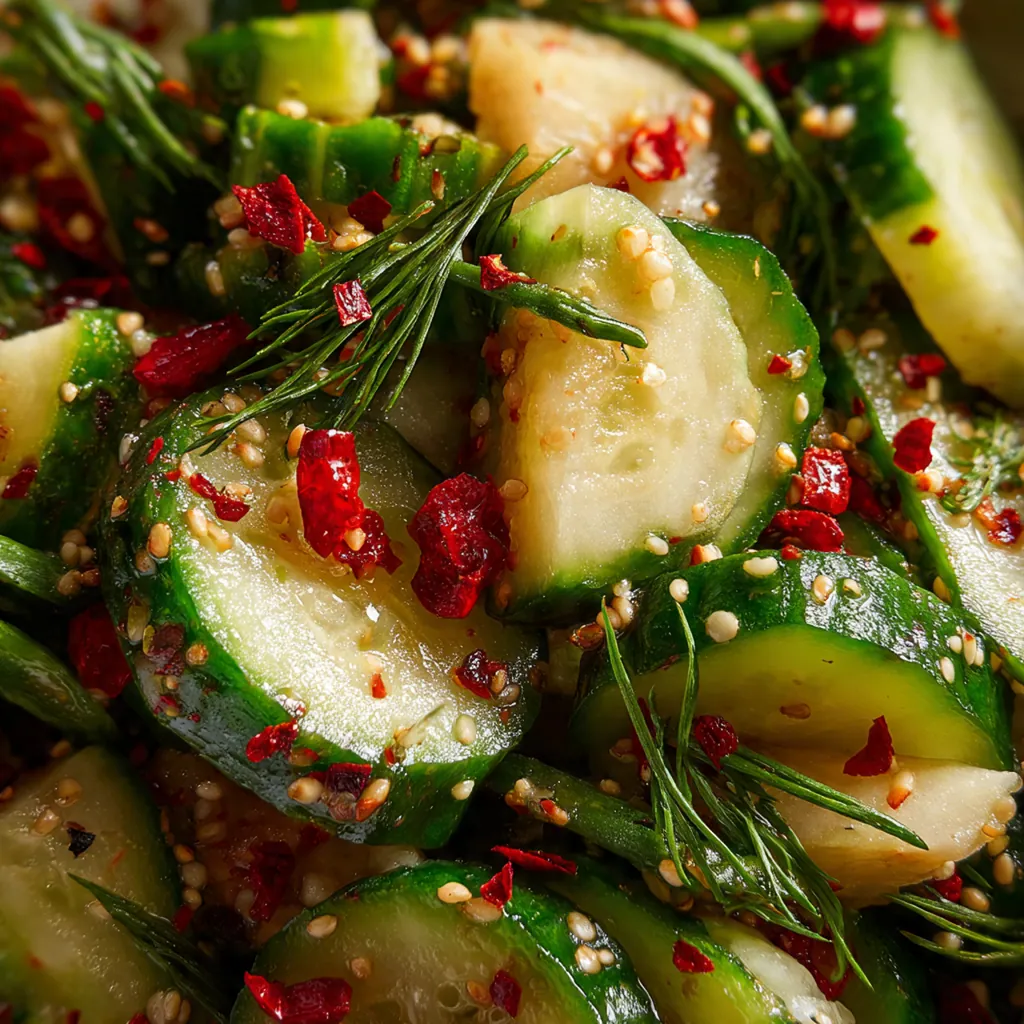
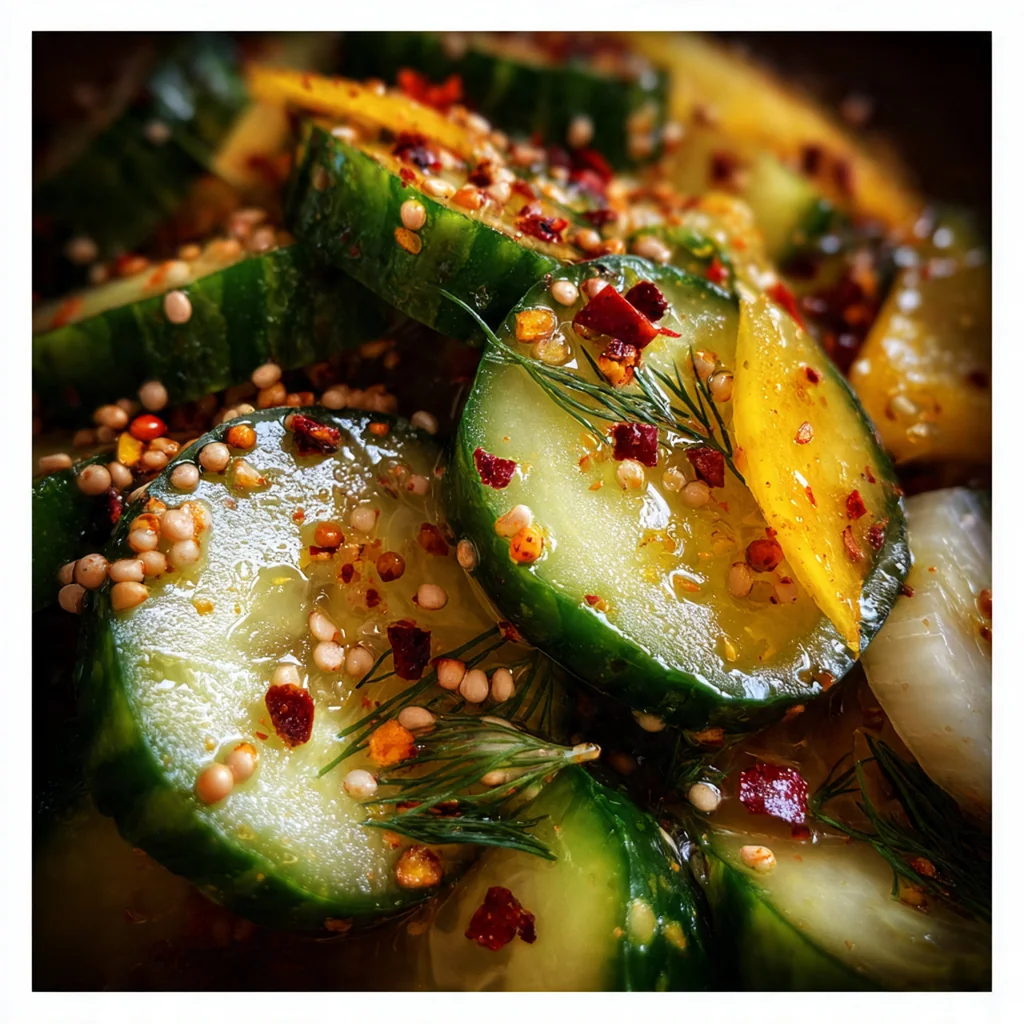
- Pickling cucumbers: Choose firm, small to medium cucumbers for the best crunch; avoid waxed varieties as they don’t pickle well.
- Yellow onion: Thinly sliced yellow onions add a sweet sharpness that mellows beautifully in the brine.
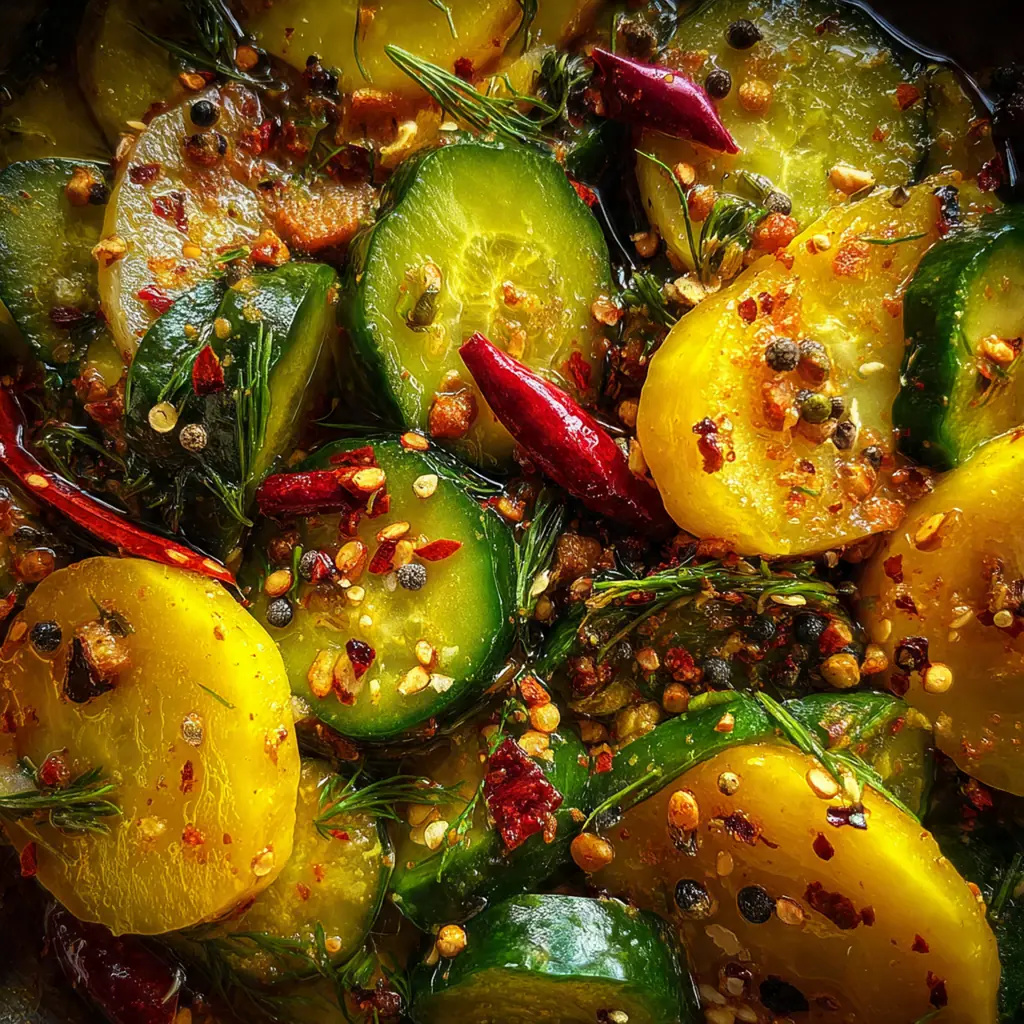
- Red bell peppers: They bring vibrant color and a sweet, slightly fruity flavor to the mix.
- Green bell peppers: These offer a crisp, fresh contrast and more of that festive holiday color.
- Jalapeño peppers: Leave the seeds in for that signature Texas heat, or remove them to tame the spice.
- Garlic: Lightly smashed cloves infuse the brine with a warm, aromatic backbone that deepens over time.
- Granulated sugar: This creates the sweet balance that counteracts the vinegar and heat perfectly.
- White distilled vinegar: With 5% acidity, it provides the clear, sharp tang essential for proper pickling.
- Apple cider vinegar: Adds a slightly fruity, complex note that rounds out the brine’s flavor.
- Pickling salt or kosher salt: Use these because table salt can cloud the brine; they dissolve cleanly.
- Mustard seeds: They contribute a subtle, earthy pungency and classic pickle flavor everyone loves.
- Celery seeds: These tiny seeds offer a warm, savory note that complements the vegetables beautifully.
- Ground turmeric: It gives the pickles their golden hue and a hint of earthy bitterness.
- Extra jalapeño slices: Optional for garnish, adding an extra kick and visual appeal to your jars.
- Fresh dill sprigs: Optional for a traditional pickle aroma and a pretty, fragrant presentation.
How to Make It
Prepare the Vegetables:
Start by combining all your sliced cucumbers, onions, bell peppers, jalapeños, and smashed garlic in a large bowl. Tossing them gently ensures everything is evenly mixed, which helps the brine penetrate every piece. I like to do this first so the vegetables are ready when the brine is hot.
Make the Brine:
In a large non-reactive pot, like stainless steel or enamel, mix together the sugar, both vinegars, salt, mustard seeds, celery seeds, and turmeric. Using a non-reactive pot prevents any metallic flavors from leaching into your pickles, which is key for that clean, bright taste.
Heat the Brine:
Place the pot over medium-high heat and bring the mixture to a boil, stirring frequently. You’ll know it’s ready when the sugar and salt have completely dissolved, which usually takes about three to five minutes. Don’t walk away during this step to avoid any scorching.
Combine and Cook:
Carefully pour the hot brine over the bowl of prepared vegetables. Give it a gentle stir to make sure every piece is submerged. Letting it sit for ten minutes allows the flavors to start marrying and the vegetables to soften just slightly—this is the secret to the perfect texture.
Pack the Jars:
Using a slotted spoon, transfer the hot vegetables into clean, warm pint-sized jars or airtight containers. Leave about half an inch of headspace at the top to allow for expansion. Packing them while hot helps with the sealing process if you’re using canning jars.
Add Brine:
Pour the remaining hot brine over the pickles in each jar, ensuring all vegetables are fully covered. Gently tap the jars on the counter to release any trapped air bubbles, which helps prevent spoilage and ensures even pickling.
Seal and Cool:
If you’re using canning jars, wipe the rims clean with a damp cloth, then place the lids on and screw the bands until they’re fingertip-tight. Let the jars cool completely on the counter; as they cool, you might hear the satisfying pop of the lids sealing.
Chill and Wait:
Once the jars are at room temperature, move them to the refrigerator. You must wait at least 48 hours before diving in—the flavors develop and become more complex over time, making the wait absolutely worth it.
You Must Know
- The 10-minute sit in hot brine is crucial for perfect texture
- Always use pickling or kosher salt to keep the brine clear
- Refrigerate for at least two days for flavors to fully develop
- These pickles are not shelf-stable and must be kept cold
- I never skip the jalapeño seeds for that authentic Texas kick
Storage Tips
Once your Texas Christmas Pickles are ready, store them in airtight jars in the refrigerator where they’ll keep beautifully for up to three months. Remember, these are refrigerator pickles, so they aren’t processed for shelf stability and must stay cold to stay safe. Don’t worry if the brine gets a little cloudy over time—that’s just the spices and vegetables doing their thing and it’s completely normal. I always label my jars with the date so I know when I made them, and I’ve found they often taste even better after a few weeks as the flavors really meld together.
Ingredient Substitutions
If you can’t find pickling cucumbers, English cucumbers or small Persian cucumbers work well, just slice them similarly. For a milder heat, use poblano peppers instead of jalapeños, or for more fire, add a habanero. White vinegar can be replaced with more apple cider vinegar for a fruitier tang, or vice versa. In a pinch, regular sea salt can stand in for pickling salt, but avoid iodized table salt. No mustard seeds? Try a teaspoon of dry mustard powder for a similar depth. I’ve even used honey instead of sugar for a different sweetness profile, though it will darken the brine slightly.
Serving Suggestions
I love serving these pickles straight from the jar as a zesty snack, but they’re also fantastic chopped up and stirred into potato or chicken salad for a bright kick. Layer them on holiday burgers or leftover turkey sandwiches for an extra pop of flavor, or arrange them on a festive relish tray with cheeses, crackers, and cured meats. They even pair wonderfully with grilled sausages or as a topping for hot dogs—basically, anywhere you want a sweet, spicy, and tangy crunch. My family always insists on having a bowl out during holiday gatherings for everyone to nibble on.
Cultural Context
Texas Christmas Pickles are a beloved holiday tradition that captures the bold, independent spirit of Texas cuisine. Unlike many sweet pickles, these incorporate jalapeños for a characteristic heat that reflects the state’s love for spicy food. The vibrant red and green bell peppers make them visually festive, perfect for Christmas tables across the Lone Star State. They likely evolved from classic sweet pickle recipes brought by settlers, with Texans adding their own twist by including local peppers. Today, they’re a homemade gift staple, often shared among friends and family during the holidays, symbolizing both warmth and hospitality. Making a batch is like participating in a generations-old ritual that celebrates community and flavor in every bite.
Pro Tips
- Soak cucumber slices in ice water first for an extra crisp texture
- Adjust the heat by seeding jalapeños or adding a habanero
- Letting the mix sit in the hot brine is the texture secret
- Use decorative jars and a warning tag for holiday gifting
- I always make a double batch because they disappear so fast
Frequently Asked Questions
For authentic Texas Christmas Pickles, use firm pickling cucumbers (also called Kirby cucumbers). Their smaller size and crisp texture hold up perfectly to the sweet and spicy brine without becoming mushy, unlike regular salad cucumbers.
Absolutely! Texas Christmas Pickles taste even better after marinating. You can prepare them up to 2 weeks in advance. Store the jars in the refrigerator to let the flavors fully develop and intensify for your holiday meals or as a ready-made gift.
If you want milder Texas Christmas Pickles, remove the seeds and ribs from the jalapeños, or use 1-2 poblano peppers instead. For more heat, try adding a sliced serrano pepper or a 1/4 teaspoon of red pepper flakes to the brine.
Your Texas Christmas Pickles are ready to eat once the brine has cooled and the jar is sealed. For the best flavor, wait at least 24 hours. The cucumbers and peppers will become vibrantly colored and perfectly infused with the sweet, spicy, and tangy brine.
These tangy Texas Christmas Pickles are incredibly versatile! Serve them alongside holiday ham or smoked brisket, on a charcuterie board, with sandwiches, or as a zesty topping for burgers. They also make a fantastic standalone snack.