


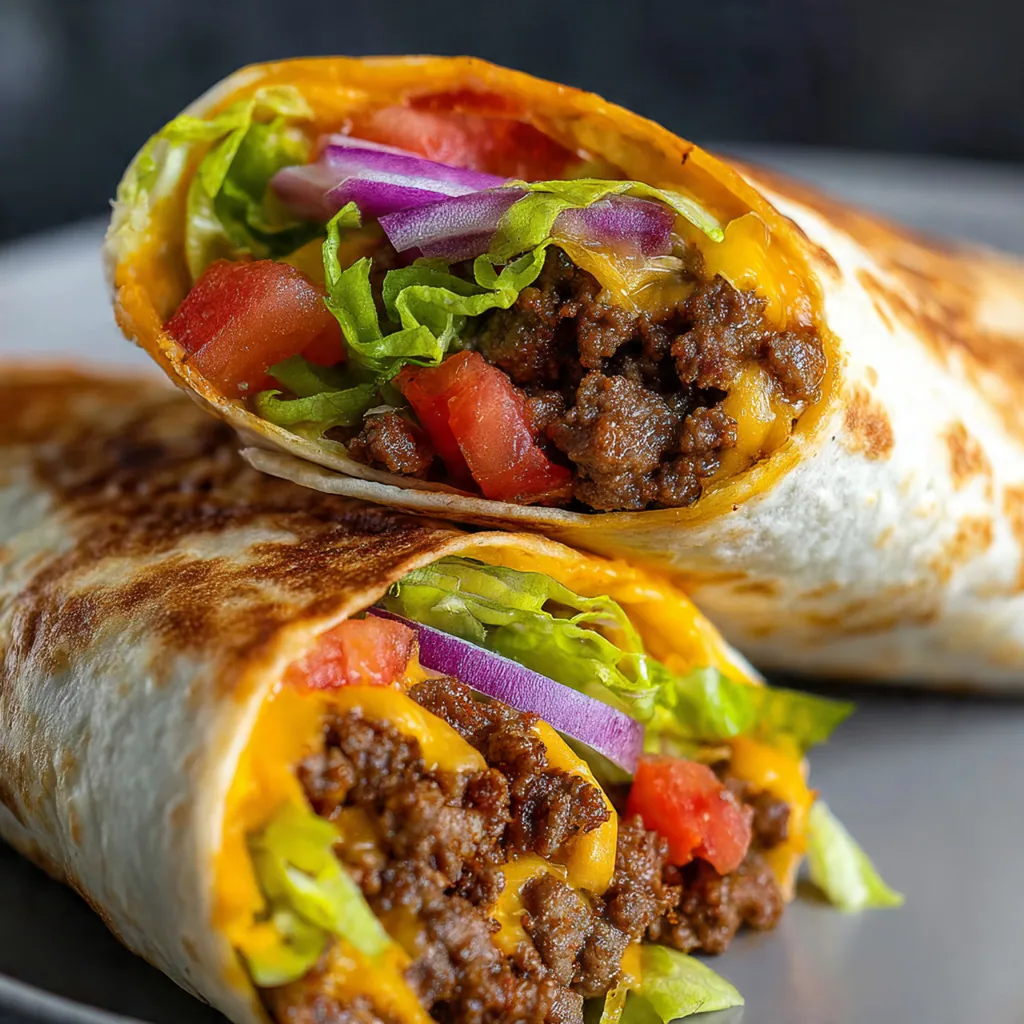
If you’re craving that classic burger taste in a crispy handheld form, these Air Fryer Cheeseburger Wraps are your perfect weeknight solution. They capture all the juicy, savory goodness of a diner favorite and transform it into a golden, portable meal. This American-inspired dish is a testament to the air fryer’s ability to create incredible texture without the mess of deep frying. You’ll love how quickly it all comes together for a dinner the whole family gets excited about.
Why You'll Love This Recipe
- You get a satisfying meal on the table in under 30 minutes
- Every bite has the perfect mix of juicy beef and melty cheddar
- They’re a fun, handheld alternative to traditional burgers
- Air frying gives you that crave-worthy crunch with way less oil
- My kids ask for these every single week
Ingredients You’ll Need
- Ground beef (80/20 blend): This ratio gives you the perfect balance of flavorful fat for juicy filling and lean enough meat to avoid greasy wraps. Look for fresh, bright red beef without any gray spots.
- Yellow onion: Finely dicing it ensures it cooks quickly and blends seamlessly into the beef mixture, adding a sweet, savory depth that’s essential for that classic burger flavor.
- Garlic: Minced garlic infuses the beef with a robust, aromatic base. Fresh cloves will always give you a brighter taste than pre-minced jars.
- Kosher salt: Its coarse grains distribute evenly and season the beef deeply, enhancing all the other flavors in your Air Fryer Cheeseburger Wraps.
- Black pepper: Freshly ground pepper adds a subtle heat and earthiness that complements the rich beef and sharp cheese beautifully.
- Worcestershire sauce: This umami-packed ingredient is the secret weapon, adding a complex savory tang that makes the filling taste truly authentic.
- Ketchup: It brings a touch of sweetness and tomato richness, helping to bind the filling and mimic that classic burger sauce.
- Yellow mustard: Its bright, tangy punch cuts through the richness and is a non-negotiable for true cheeseburger character.
- Flour tortillas (10-inch): The large size gives you plenty of room to roll a generous filling without tearing. They crisp up wonderfully in the hot air.
- Shredded cheddar cheese: It melts into gooey perfection inside the wrap. Pre-shredded works, but cheese you shred yourself will melt more smoothly.
- Dill pickle slices: Their briny crunch is the essential textural contrast that makes every bite of your cheeseburger wraps sing.
- Olive oil or cooking spray: A light coating is the key to achieving that beautifully golden, crispy tortilla exterior in the air fryer.
How to Make It
Preheat Your Air Fryer:
Start by preheating your air fryer to 370°F. This is a crucial step because a hot air fryer ensures your wraps start crisping immediately, giving you that perfect golden shell instead of a steamed one.
Cook the Beef and Aromatics:
Brown the ground beef in a skillet over medium-high heat, breaking it into small crumbles. Add the onion and garlic right as the beef starts to lose its pink color so they soften and become fragrant without burning.
Season the Filling:
Drain any excess grease from the pan, then stir in the salt, pepper, Worcestershire, ketchup, and mustard. Let it simmer for a couple minutes until the sauce thickens slightly and coats the beef. This concentrates all those incredible flavors.
Assemble the Wraps:
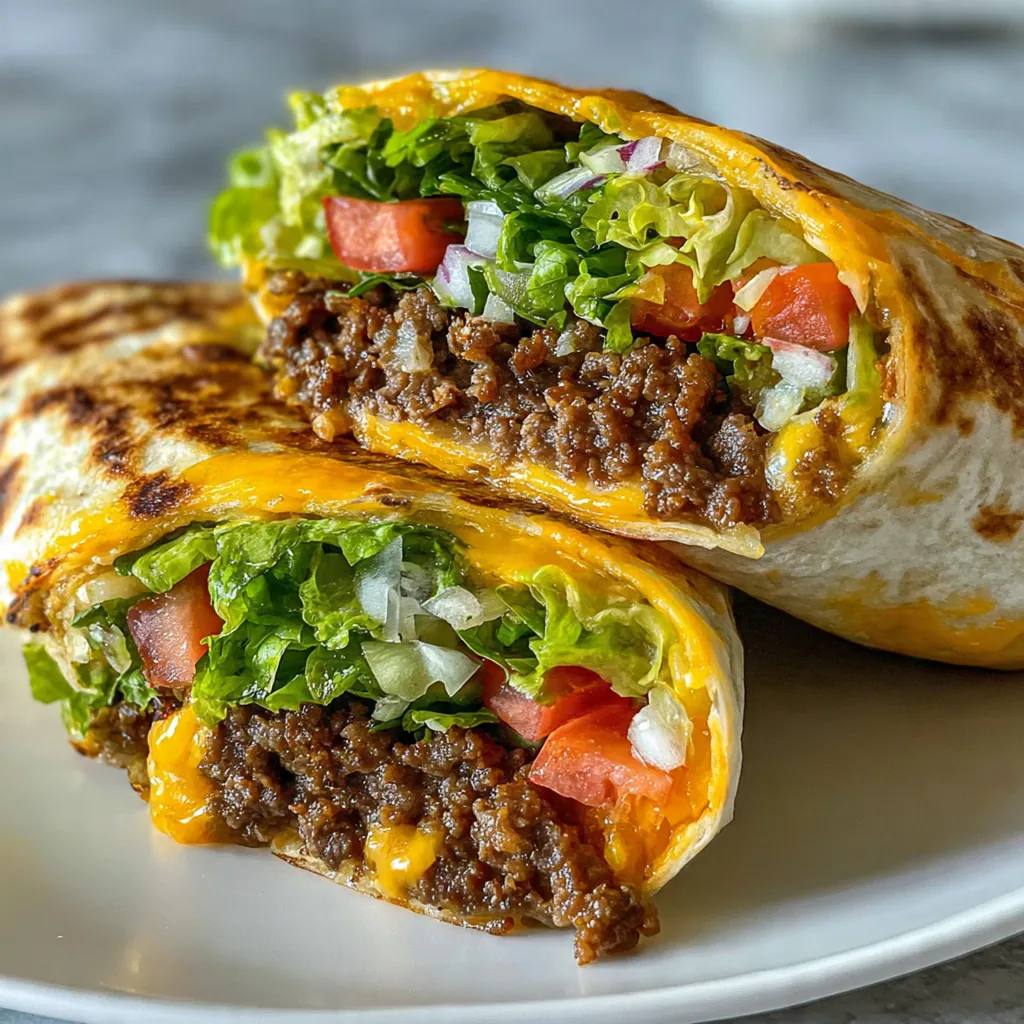
Lay your tortillas flat and divide the beef mixture down the center of each, leaving a good border. Top with a generous handful of cheese and a few pickle slices. Folding in the sides first before rolling up from the bottom keeps everything secure.
Secure and Oil the Wraps:
If your wrap feels loose, a toothpick through the seam works wonders to hold it together. Then, lightly brush or spray the outside with oil. This thin layer is what transforms the tortilla from soft to shatteringly crisp.
Air Fry to Perfection:
Place the wraps in your air fryer basket seam-side down, making sure they aren’t touching. Cook for 8-10 minutes, flipping them halfway through. You’re looking for an even, deep golden brown color and a filling that’s hot all the way through.
Rest and Serve:
Let the Air Fryer Cheeseburger Wraps cool for just a few minutes after they come out. This lets the cheese set slightly so it doesn’t burn your mouth and allows the tortilla to firm up for the ideal crispy bite.
You Must Know
- Let the beef mixture cool a bit before assembling
- Don’t overfill the tortilla or it will tear
- Preheating the air fryer is non-negotiable for crispiness
- I always use toothpicks for a tight seal
Storage Tips
If you somehow have leftovers, let the wraps cool completely before storing them in an airtight container in the fridge—they’ll stay good for about three days. When you’re ready to eat, skip the microwave and reheat them right back in the air fryer at 350°F for three to four minutes. That blast of hot air will revive the crispy exterior much better than any other method, though the tortilla will never be quite as perfect as it was on day one. I often pack a cold one for lunch and find it’s still pretty fantastic.
Ingredient Substitutions
You can easily swap the ground beef for ground turkey or chicken for a lighter option, just add an extra splash of Worcestershire for depth. If cheddar isn’t your thing, American cheese will give you that classic super-melty burger experience, or pepper jack adds a nice kick. For a gluten-free version, your favorite gluten-free tortillas work perfectly, just check that they’re pliable enough to roll. No pickles? A spoonful of relish mixed right into the beef works in a pinch, and if you’re out of yellow mustard, Dijon or even a bit of mayonnaise can fill that creamy, tangy role.
Serving Suggestions
These wraps are a complete meal on their own, but they shine alongside a simple side. A crisp green salad with a tangy vinaigrette cuts through the richness perfectly, or go all-in with a basket of air fryer french fries or onion rings for the ultimate diner-at-home experience. For a lighter touch, some carrot sticks, cucumber slices, and extra dipping sauces like ranch or a special burger sauce make for a fun, interactive plate. I love setting out little bowls of extra toppings like shredded lettuce and diced tomato so everyone can customize their own wrap just how they like it.
Cultural Context
The cheeseburger is a quintessential American comfort food, a symbol of diners, drive-ins, and backyard barbecues. This recipe takes that iconic format and reimagines it for modern, convenience-focused cooking by utilizing the air fryer, a tool that’s become a kitchen staple for its ability to mimic deep-fried texture. Wrapping handheld meals in tortillas also nods to the endless versatility and global influence of wrap culture, where any filling can be neatly packaged and eaten on the go. It’s a fun fusion that respects the classic flavors while embracing a faster, less messy way to enjoy them any night of the week.
Pro Tips
- A slightly cooled filling won’t steam your tortilla soft
- Spraying the wraps with oil guarantees maximum crispiness
- Use toothpicks to secure any tricky rolls before cooking
- Preheating is the secret to that perfect golden shell
- I always make a double batch for easy lunches
Frequently Asked Questions
Yes, you can use leaner ground beef like 90/10 or even ground turkey, but an 80/20 blend provides the best juiciness and flavor that mimics a classic burger. If using leaner meat, consider adding a teaspoon of olive oil to the skillet while browning to prevent dryness.
You can prep the filling up to 2 days ahead and store it in the fridge. For best results, assemble and air fry just before serving to keep the tortillas perfectly crispy. Leftover cooked wraps reheat well in the air fryer at 350°F for 3-4 minutes.
Dijon or whole-grain mustard can be used for a different flavor profile. You could also use a tablespoon of burger sauce or even a bit of pickle juice for tang. The key is to add that classic, slightly sharp accent to the beef filling.
They’re ready when the tortillas are golden brown and crispy, which takes about 10-12 minutes in a preheated air fryer at 375°F. You’ll also see the cheese inside melting. No flipping is needed, but you can check at the 10-minute mark for your preferred level of crispness.
Keep it classic with burger sides! Serve them with a simple green salad, crispy air-fried french fries or sweet potato fries, or a side of coleslaw. For dipping, extra ketchup, mustard, or a creamy burger sauce is perfect.