


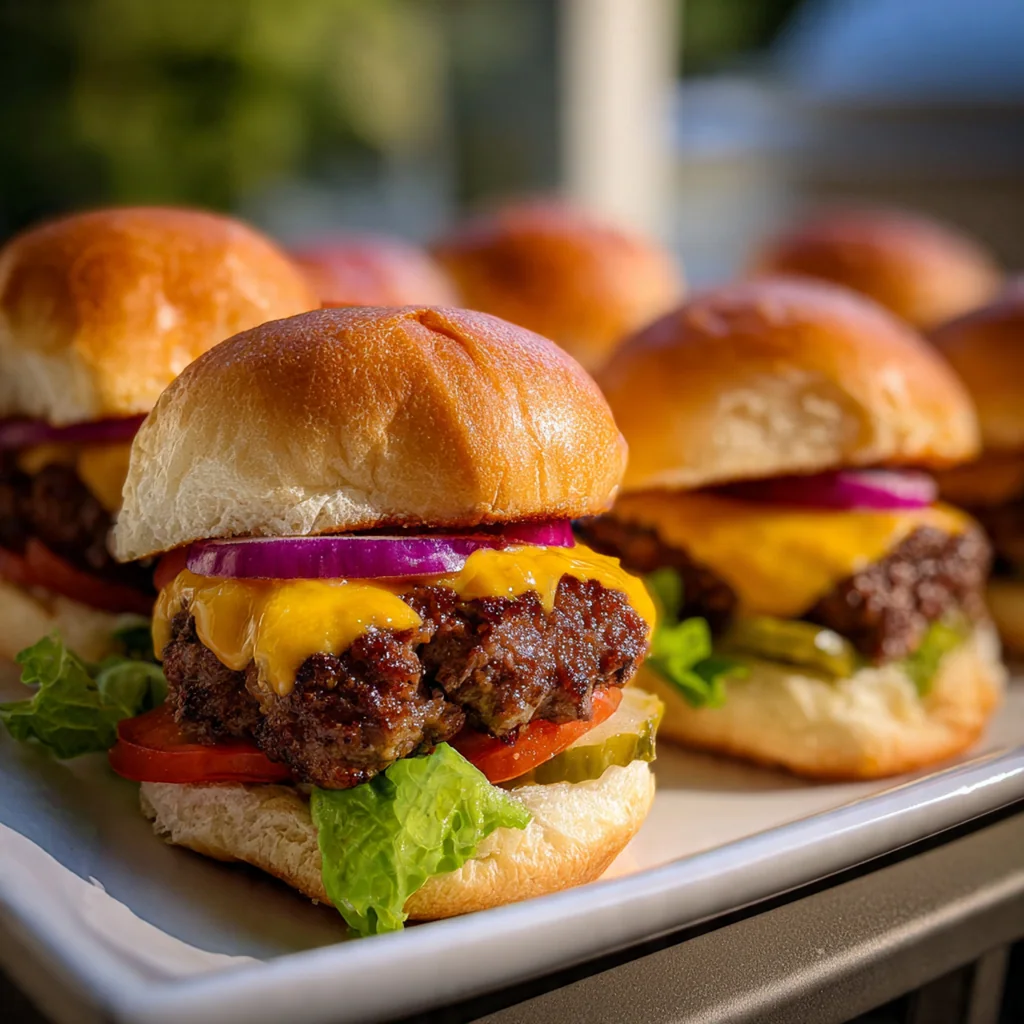
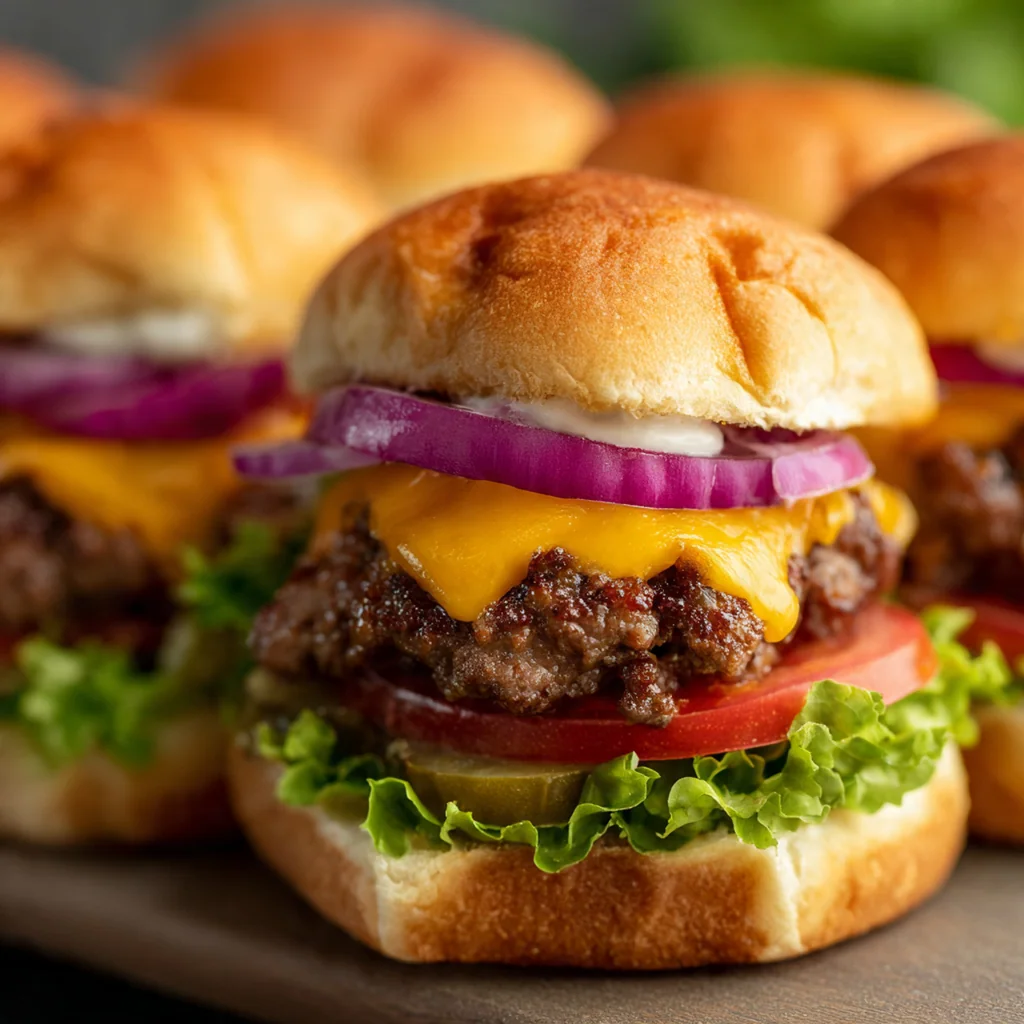
Best Cheeseburger Sliders are the ultimate party food that brings big burger flavor to perfect mini portions. I’ve made these for countless gatherings and they always disappear faster than I expect. There’s something about the combination of seasoned beef, melted cheddar, and soft buns that just works every single time. These sliders capture that nostalgic diner taste while keeping everything manageable for a crowd.
Why You'll Love This Recipe
- Perfect party food that feeds a crowd without the hassle
- Mini size makes them irresistible and easy to eat
- The seasoning blend gives that authentic burger joint flavor
- One-pan baking method means minimal cleanup
- I make these for every backyard gathering and they’re always gone in minutes
Ingredients You’ll Need
- Ground beef 80/20: This fat ratio creates the juiciest sliders that stay tender. Leaner meat tends to dry out during cooking. Look for bright cherry-red color at your butcher counter.
- Slider buns: Hawaiian sweet rolls add a touch of sweetness while brioche brings richness. Choose buns that feel soft when pressed but not squishy. They should smell fresh and look golden.
- Cheddar cheese: Sharp cheddar delivers that classic burger cheese flavor. Keep slices cold until the last moment for cleaner melting. Fresh deli slices melt better than pre-packaged.
- Worcestershire sauce: This secret ingredient adds deep umami flavor that makes these taste like real diner burgers. It brings a savory complexity that you can’t get from salt alone. Don’t skip this step.
- Garlic powder: Provides consistent garlic flavor throughout every bite without burning. It’s more reliable than fresh garlic for this quick cooking method. Sprinkle evenly across the meat mixture.
- Onion powder: Delivers sweet onion flavor that permeates the entire patty. Fresh onion can release too much moisture and make the meat mushy. This keeps the texture perfect.
- Smoked paprika: Adds subtle smokiness and beautiful color to the beef. It mimics the flavor of grill cooking. Use quality paprika for the best taste impact.
- Salt: Essential for bringing out all the other flavors. Kosher salt works best for even distribution. It seasons the meat and helps create a nice crust.
- Black pepper: Freshly cracked adds a gentle heat and aromatic quality. It balances the richness of the beef and cheese. Always grind fresh for maximum flavor.
- Butter: Melted butter brushed on top creates that golden, bakery-style crust. It helps the buns bake up tender inside and crispy outside. Use unsalted so you control the sodium.
- Olive oil: Provides the cooking fat for searing the patties to golden brown. It has a high smoke point and neutral flavor. A good drizzle prevents sticking and promotes browning.
- Dill pickle slices: The tangy crunch cuts through the rich meat and cheese. They add that essential burger shop brightness. Choose crisp, fresh slices without sogginess.
- Yellow onion: Diced and sautéed until caramelized, they bring sweet depth. Yellow onions have the perfect balance of sweet and sharp. Cook them slowly for maximum flavor development.
- Sesame seeds: Optional but they add that authentic burger joint look and nutty crunch. Sprinkle them on top before baking for best results. They toast slightly in the oven.
- Yellow mustard: Classic burger condiment for serving on the side. Its tangy bite complements the rich sliders perfectly. Let guests add their preferred amount.
- Ketchup: Sweet and familiar, it’s the perfect dipping sauce. Offer it alongside the mustard for variety. Kids especially love having this option.
- Lettuce leaves: Fresh crisp lettuce adds texture and freshness. Layer it under the patty or serve on the side. Iceberg or romaine work great for crunch.
- Tomato slices: Juicy tomato brings a fresh, bright element to balance the richness. Choose ripe but firm tomatoes so they don’t make things soggy. Serve on the side for optional topping.
How to Make It
Preheat and Prepare Pan:
Preheat your oven to 375°F. Place your slider buns in a 9×13 baking pan, then slice them horizontally through the middle to create a top and bottom layer. Keep the top and bottom halves separate and set aside while you prepare the meat. This assembly-line setup makes putting everything together quick and easy.
Mix the Meat Seasoning:
In a large bowl, combine the ground beef with Worcestershire sauce, garlic powder, onion powder, smoked paprika, salt, and black pepper. Use your hands to mix gently just until everything is combined. Overworking the meat makes tough sliders, so stop mixing as soon as you don’t see any more dry spots. The mixture should look uniform but not compacted.
Form the Patties:
Divide the meat mixture into 12 equal portions and roll each into a ball. Flatten each ball into a patty that’s slightly wider than your slider buns. The patties will shrink during cooking, so starting a bit wider ensures good coverage. Make a small indent in the center of each patty with your thumb to prevent them from puffing up into balls while cooking.
Cook the Patties:
Heat olive oil in a large skillet over medium-high heat. Cook the patties in batches if needed, giving each one 2-3 minutes per side. You want them browned and cooked through to 160°F internal temperature. Don’t overcrowd the pan or they’ll steam instead of sear. Transfer the cooked patties to a plate and keep them warm.
Caramelize the Onions:
In the same skillet, quickly sauté the diced onions for 2-3 minutes until they’re softened and slightly caramelized. The onions will pick up all the delicious browned bits from the burger drippings. This adds incredible flavor that you can’t get from raw onions. Keep an eye on them so they don’t burn.
Assemble the Sliders:
Place the bottom half of the buns in the baking pan. Layer the cooked patties evenly over the buns, then top each with a slice of cheddar cheese. Add the sautéed onions and pickle slices over the cheese. The cheese should be cold right until this moment for the cleanest melt. Place the top half of the buns over everything to complete the stack.
Prepare for Baking:
Brush the melted butter generously over the tops of the buns. Sprinkle with sesame seeds if you’re using them. Cover the pan tightly with aluminum foil. The butter helps create that golden crust while the foil keeps everything moist and melts the cheese perfectly. Don’t skip the butter step.
Bake to Perfection:
Bake covered for 10 minutes, then remove the foil and bake for an additional 5 minutes. The buns should be golden brown and the cheese completely melted and bubbly. Your kitchen will smell incredible. Watch carefully during the last few minutes to avoid over-browning.
Rest and Serve:
Remove from the oven and let rest for 2 minutes. This allows the cheese to set slightly so it doesn’t all ooze out when you cut them. Use a sharp knife to separate the individual sliders. Serve immediately with your favorite condiments like mustard and ketchup on the side for dipping. The contrast of hot juicy sliders and cool tangy sauce is unbeatable.
You Must Know
- 80/20 beef ratio is essential for juicy sliders
- Make that thumb indent in every patty
- Worcestershire sauce adds the secret umami
- Don’t skip the resting step after baking
- I learned the hard way that hot cheese runs everywhere if you cut too soon
Storage Tips
Store leftover sliders in an airtight container in the refrigerator for up to 3 days. Reheat them in a 350°F oven for 8-10 minutes to maintain the buns’ texture and keep everything from getting soggy. I don’t recommend the microwave because it makes the bread rubbery and the meat tough. For longer storage, you can freeze the uncooked patties for up to 3 months – just thaw them in the fridge overnight before cooking. Assembled but unbaked sliders can be wrapped tightly and refrigerated for several hours before baking, making them perfect for prepping ahead of parties.
Ingredient Substitutions
If you can’t find slider buns, regular hamburger buns cut in half work fine, though you’ll need fewer total. Ground turkey or chicken can replace beef, but you’ll want to add an extra tablespoon of olive oil to prevent dryness. For a gluten-free version, use your favorite GF slider buns and double-check that your Worcestershire sauce is gluten-free. Swiss or provolone cheese makes great alternatives to cheddar if you want a different flavor profile. If you don’t have smoked paprika, regular paprika works, though you’ll lose that subtle smokiness. The seasoning blend is flexible – add a pinch of cumin or chili powder if you like a Tex-Mex twist.
Serving Suggestions
These sliders pair perfectly with crispy french fries or sweet potato wedges straight from the oven. For a complete spread, add tangy coleslaw and some baked beans to the table. They’re fantastic alongside a fresh garden salad with ranch dressing to balance the richness. For game day, serve them with potato salad, chips, and plenty of cold beer. Kids love them with mac and cheese on the side. For an elevated touch, offer a platter of grilled vegetables or a simple caprese salad. They’re substantial enough to be the main event but also work as part of a larger buffet where guests can graze.
Cultural Context
Sliders represent the heart of American comfort food culture, evolving from the classic White Castle original that started in 1921. These mini burgers became synonymous with late-night cravings, backyard barbecues, and game day celebrations across the country. What makes them uniquely American is that perfect combination of simple, satisfying flavors that bring people together without pretense. While they started as a fast-food staple, home cooks have embraced sliders as a way to create restaurant-quality burgers without the hassle of managing a full grill. They’re the ultimate crowd-pleaser that bridges generations – grandparents remember the original sliders, while kids love the perfect portion size. This recipe captures that nostalgic diner flavor while using accessible ingredients and a home kitchen method that delivers consistent results.
Pro Tips
- Use 80/20 ground beef for the juiciest sliders – leaner meat will dry out
- Make a small indent in the center of each patty with your thumb to prevent bulging while coo…
- Don’t skip the Worcestershire sauce – it adds umami depth that makes them taste like real bu…
- Keep the cheese cold until the last moment for cleaner slicing and better melt
- I always make a test patty first to check my seasoning – you can cook it quick and taste bef…
Frequently Asked Questions
What sets these Best Cheeseburger Sliders apart is the special seasoning blend featuring garlic powder, onion powder, and smoked paprika. The Worcestershire sauce adds umami depth, while using 80/20 ground beef ensures juicy, flavorful patties every time. The cheddar cheese melts perfectly over the sliders for that authentic cheeseburger taste.
You can prepare the patties for Best Cheeseburger Sliders up to 24 hours ahead. Keep the seasoned beef mixture refrigerated, then shape and cook just before serving. For fully cooked sliders, they’ll keep in the fridge for 3 days. Reheat gently in the oven wrapped in foil to prevent drying out.
For these Best Cheeseburger Sliders, you can swap cheddar with Swiss, provolone, pepper jack, or American cheese slices. Each brings a different flavor profile – Swiss offers nuttiness, pepper jack adds spice, and American melts ultra-creamy. The key is using sliced cheese rather than shredded for even melting coverage.
The Best Cheeseburger Sliders are ready when the internal temperature reaches 160°F for medium doneness. Look for browned edges on the patties and cheese that’s fully melted. If you don’t have a thermometer, cut one slider open to check – the center should be no longer pink and the juices should run clear.
Classic American sides pair perfectly with Best Cheeseburger Sliders. Try crispy french fries, tater tots, potato salad, or coleslaw. For a complete party spread, add pickles, diced onions, and condiments like ketchup, mustard, and mayo on the side. A simple green salad balances the richness perfectly.