


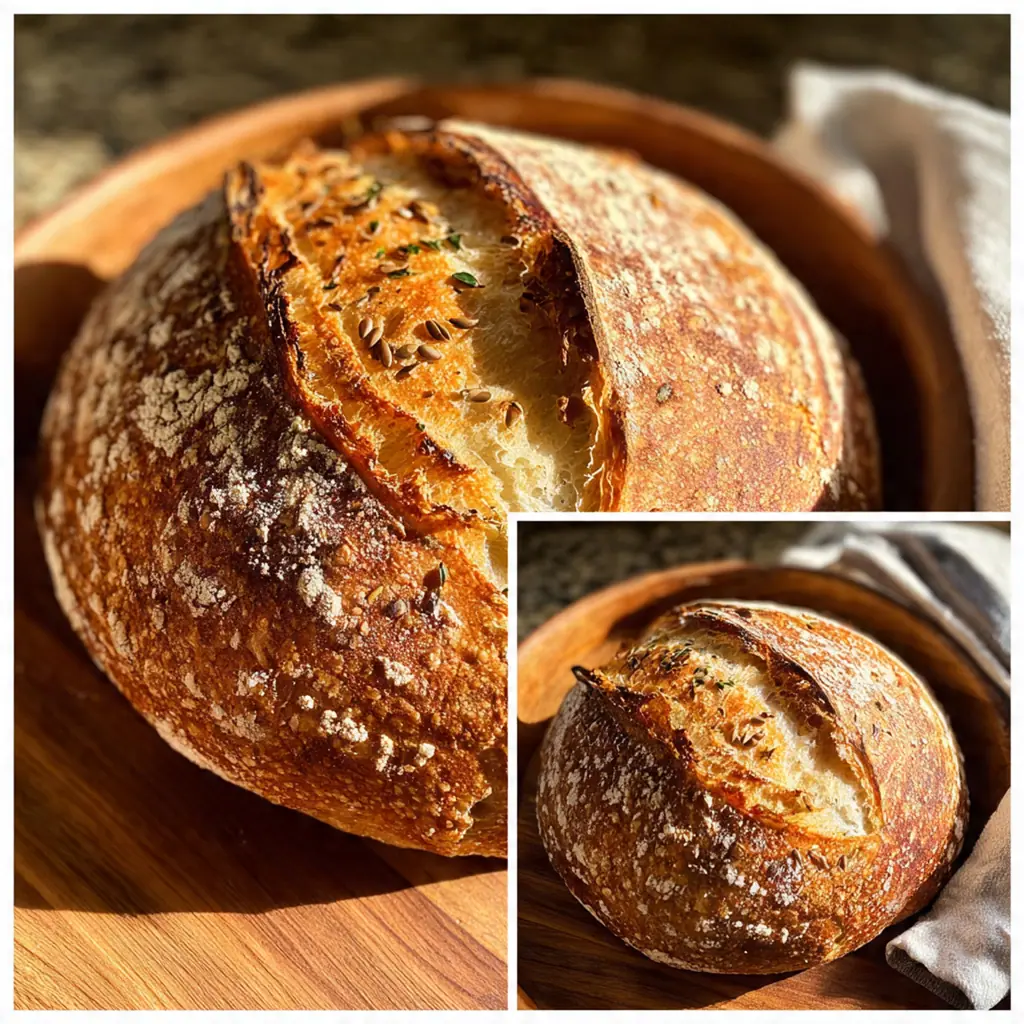
Baking the heartiest whole grain sourdough bread begins with an active sourdough starter whole grain foundation, a choice that builds incredible flavor right from the start. This naturally leavened loaf is a deeply nourishing project with a texture that’s substantial and a taste that’s wonderfully complex. It’s the kind of American baking that turns simple ingredients into something truly special. You’ll feel a real sense of accomplishment pulling this beautiful, fragrant loaf from your own oven.
Why You'll Love This Recipe
- The long fermentation makes it easier to digest and unlocks maximum flavor
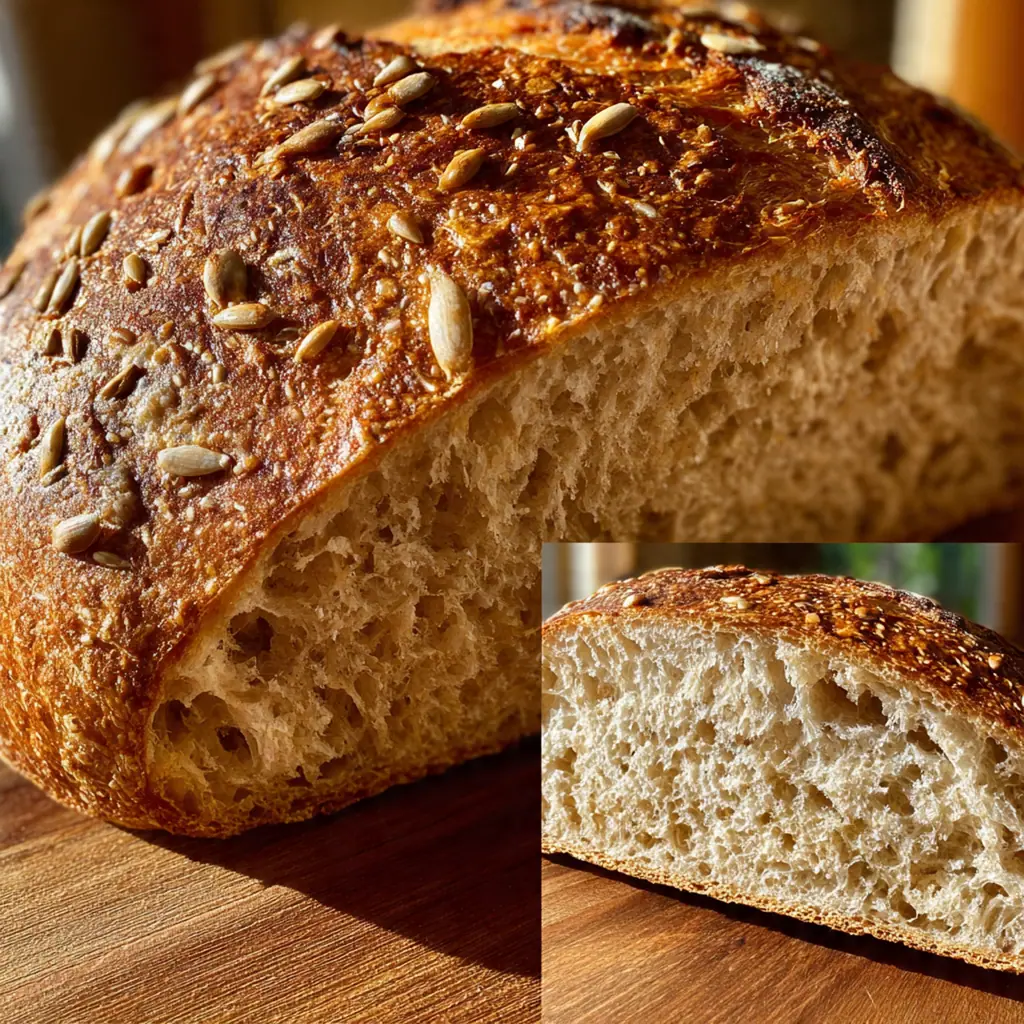
- You get the true nutty, complex taste of whole grains in every slice
- Its hearty texture holds up to any topping without getting soggy
- The Dutch oven method creates a professional-quality, crackling crust at home
- My family fights over the first slice every single time
Ingredients You’ll Need
- Active sourdough starter (100% hydration): This is the living heart of your bread; using one fed with whole wheat flour adds a deeper, nuttier flavor base and ensures a robust rise.
- Warm water: Hydrates the flour and wakes up the starter; aim for about 85°F to create a cozy environment for fermentation without killing the yeast.
- Whole wheat flour: This is the main flour, providing the signature hearty texture, rich fiber, and that wholesome, nutty character you’re after.
- Dark rye flour: Adds a subtle earthy tang and contributes to a moist, tight crumb that makes this sourdough starter whole grain bread so satisfying.
- Bread flour: A little bit gives the dough extra strength and gluten development, helping the whole grain loaf hold its shape beautifully.
- Fine sea salt: It tightens the gluten and elevates all the other flavors; fine salt dissolves more evenly into the dough than coarse.
- Honey or maple syrup: A touch of sweetness balances the natural tang of the sourdough and encourages a lovely, deep brown crust.
- Olive oil or melted butter: A little grease in the bowl prevents sticking during the bulk rise and makes handling the dough easier.
- Mixed seeds (optional): A sprinkle of sunflower, pumpkin, or flax seeds on top adds crunch, visual appeal, and extra nutrients.
- Extra flour for dusting: This prevents the shaped dough from sticking to your proofing basket or towel, ensuring a clean release.
- Softened butter for serving: Because a warm slice of this bread slathered with good butter is one of life’s simple, perfect pleasures.
How to Make It
Mix Starter and Hydrate Flours:
Combine your bubbly sourdough starter whole grain base with the warm water in a large bowl, whisking until mostly dissolved. Add all three flours and mix until you have a shaggy, stiff dough with no dry bits. Cover it with a damp towel and walk away for 45 minutes; this autolyse lets the flour fully hydrate and makes the dough much easier to work with later.
Incorporate Salt and Sweetener:
After the rest, sprinkle the salt and honey over the top of the dough. Wet your hands to prevent sticking, then dive in, folding and pinching the dough to work everything in. It’ll feel sticky and messy at first, but just keep going for a few minutes until it comes together into a more cohesive mass.
Begin Stretch and Folds:
Perform your first set of stretch and folds right in the bowl. With wet hands, grab one side, stretch it up, and fold it over the center. Rotate the bowl and repeat three more times. This gentle technique builds strength in the dough without aggressive kneading. Cover the bowl and let it rest for 30 minutes.
Build Dough Strength:
Over the next 2 to 3 hours, repeat that stretch and fold routine every 30 minutes. You’ll do this about 4 to 5 times total. You’ll feel the dough transform with each session, becoming smoother, stronger, and slightly bubbly. This is the gluten developing and the starter doing its magic.
Shape and Cold Proof:
Gently turn the dough out onto a lightly floured surface. Shape it into a round boule by tucking the edges underneath itself. Place it seam-side up into a well-floured proofing basket or a bowl lined with a floured towel. Cover it and put it straight into the fridge for that slow, 8 to 12 hour cold proof.
Preheat and Score:
The next day, place your Dutch oven with its lid into your oven and preheat to 450°F for a full 45 minutes. Carefully take the hot pot out. Gently turn your proofed dough onto a piece of parchment paper, sprinkle with seeds if using, and score the top with a sharp blade. This slash controls the expansion and gives you that beautiful ear.
Bake Covered for Steam:
Using the parchment paper as a sling, carefully lower the dough into the hot Dutch oven. Put the lid on and bake for 25 minutes. The trapped steam creates that phenomenal, crispy, blistered crust that makes artisan bread so irresistible.
Uncover and Finish Baking:
Remove the lid – you’ll see your loaf has sprung up beautifully. Reduce the oven temperature to 425°F and bake for another 18 to 22 minutes uncovered. Bake until the loaf is a deep, rich brown and sounds hollow when tapped on the bottom.
Cool Completely:
This is the hardest part. Transfer the loaf to a wire rack and let it cool completely, for at least 3 to 4 hours. Slicing too soon releases steam and leaves the crumb gummy. Patience rewards you with the perfect, set texture.
You Must Know
- Your starter must be active and bubbly – do the float test
- Don’t skip the autolyse rest; it’s a game-changer for handling
- A kitchen scale is non-negotiable for consistent results
- The cold proof develops more sour flavor and easier handling
- I never slice a loaf before it’s totally cool
Storage Tips
Store your completely cooled loaf right on the counter, cut-side down on your cutting board or tucked into a bread bag, and it’ll stay perfect for about 3 to 4 days. If you want to keep it longer, slice the whole loaf and freeze the slices in a sealed bag for up to 3 months – you can pop a frozen slice straight into the toaster, and it’s just as good as fresh. Never store bread in the fridge, as it accelerates staling and makes the texture dry and crumbly much faster.
Ingredient Substitutions
If you don’t have dark rye flour, you can use an equal amount of whole wheat flour, though you’ll miss that distinct earthy note. For the honey, pure maple syrup works perfectly for a vegan version, and you could even use a tablespoon of brown sugar in a pinch. Don’t have bread flour? Just use all-purpose flour instead; the loaf might be a tad less chewy but still fantastic. While a proofing basket (banneton) is ideal, any medium-sized bowl lined with a clean, well-floured kitchen towel will do the job just fine.
Serving Suggestions
This bread is a star on its own with a thick swipe of good butter and a sprinkle of flaky sea salt. It makes the most incredible avocado toast that actually holds up, and it’s sturdy enough for the heartiest sandwiches, like roast beef with sharp cheddar and horseradish. Don’t forget it’s perfect for sopping up the last bits of soup or stew, and I love it toasted and topped with a creamy egg salad for a simple, satisfying lunch.
Cultural Context
While sourdough has ancient roots across many cultures, this particular style of a hearty, mixed-grain loaf baked in a home oven speaks to the modern American baking revival. It blends the old-world tradition of natural leavening with a contemporary focus on whole, nourishing ingredients. This isn’t the mild, soft sandwich bread of the mid-20th century; it’s a return to robust, flavorful loaves where the grain itself is the highlight. Baking it connects you to a timeless craft while creating something perfectly suited for today’s table.
Pro Tips
- Do the float test on your starter before you begin
- Wet your hands to handle the sticky dough easily
- A long, cold proof is the secret to great flavor
- Tent with foil if the crust darkens too quickly
- My best loaves always come from patient, slow fermentation
Frequently Asked Questions
For the most robust flavor, feed your starter with whole wheat flour as specified. This provides more nutrients for the yeast, creating a more active starter. You can maintain it with whole wheat or a blend, but using it for this loaf ensures a deeply nutty, whole grain taste.
Absolutely. After shaping, you can cover the loaf and let it cold ferment in the refrigerator for 12-24 hours. This slows the rise and develops even more complex flavors. Simply let it come to room temperature for an hour before baking as directed.
If you don’t have dark rye, you can use an equal amount of additional whole wheat flour or light rye flour. The dark rye adds a distinct earthy depth, but the loaf will still be delicious with a different whole grain. Avoid using all bread flour, as it changes the hearty texture.
The loaf is ready when it has nearly doubled in size and passes the ‘poke test’: gently poke the dough with a floured finger. If the indentation springs back slowly and partially, it’s ready. If it springs back quickly, it needs more time. If it doesn’t spring back, it may be over-proofed.
This hearty American loaf is incredibly versatile. Serve it toasted with avocado and eggs for breakfast, as the foundation for a robust sandwich at lunch, or simply sliced with a pat of butter and a bowl of soup or stew for a comforting dinner.